5 April 2026
React Flow Drag and Drop: Advanced Interactions for Your Workflow Editor (Part 3)
This is the third part of the series on building a workflow editor with React Flow.
In this part, you'll learn the key concepts behind implementing drag and drop in your workflow editor, making it easier for users to reorganize nodes intuitively.
Drag and Drop Properties
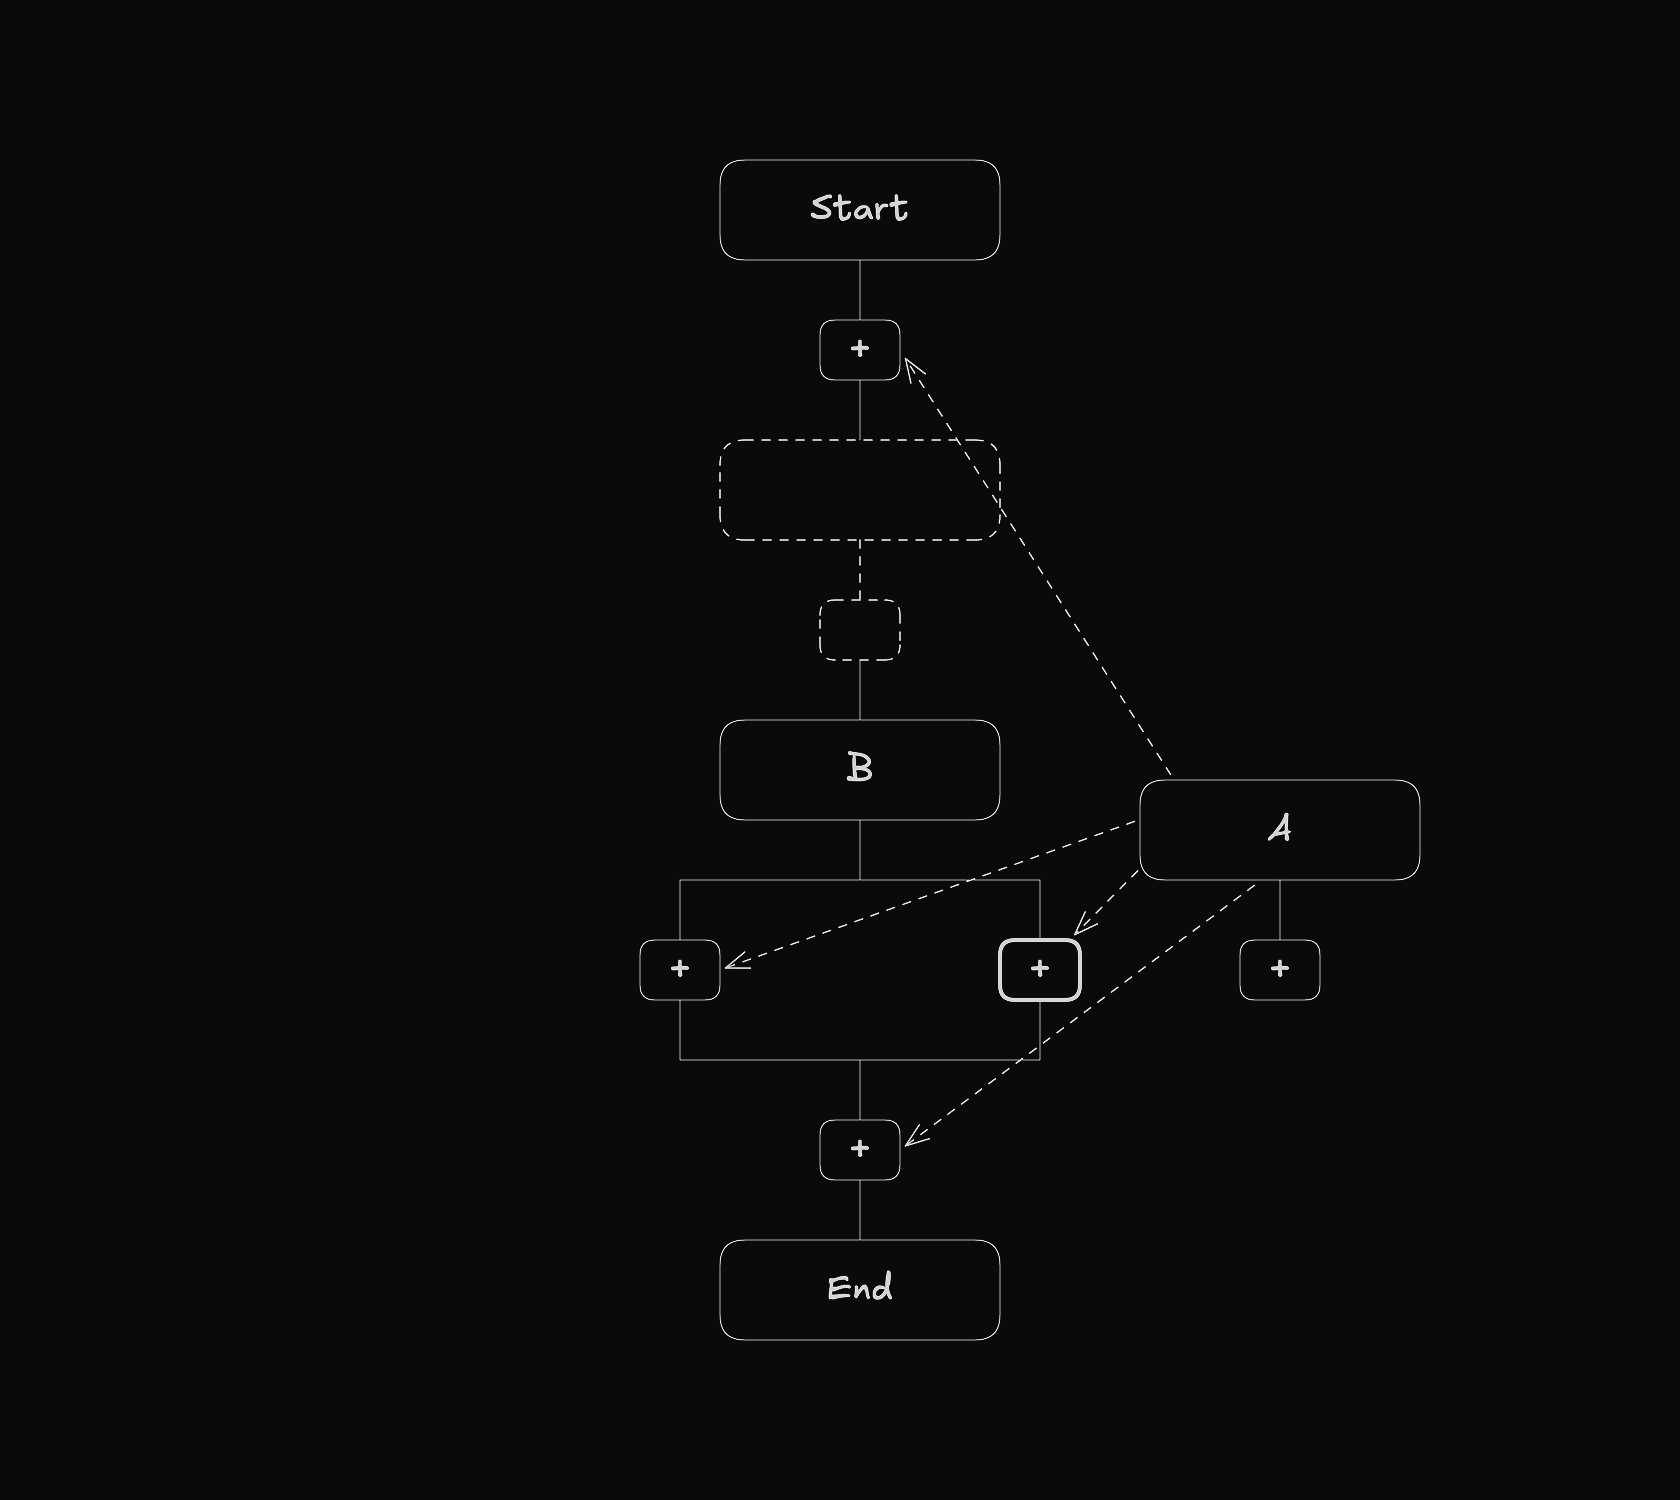
In the previous part, we structured the workflow editor using a Model View Controller pattern. To support drag and drop, the workflow state needs to be extended with these new properties:
draggingproperties: Exist on each element and store whether that element is currently being dragged and its location at that moment.dropproperties: Exist across the different workflow types and store the id of any dragged element that is near that drop area.
To understand how that works take a look at the following image.

When an element is being moved, the dragging property updates to reflect that.
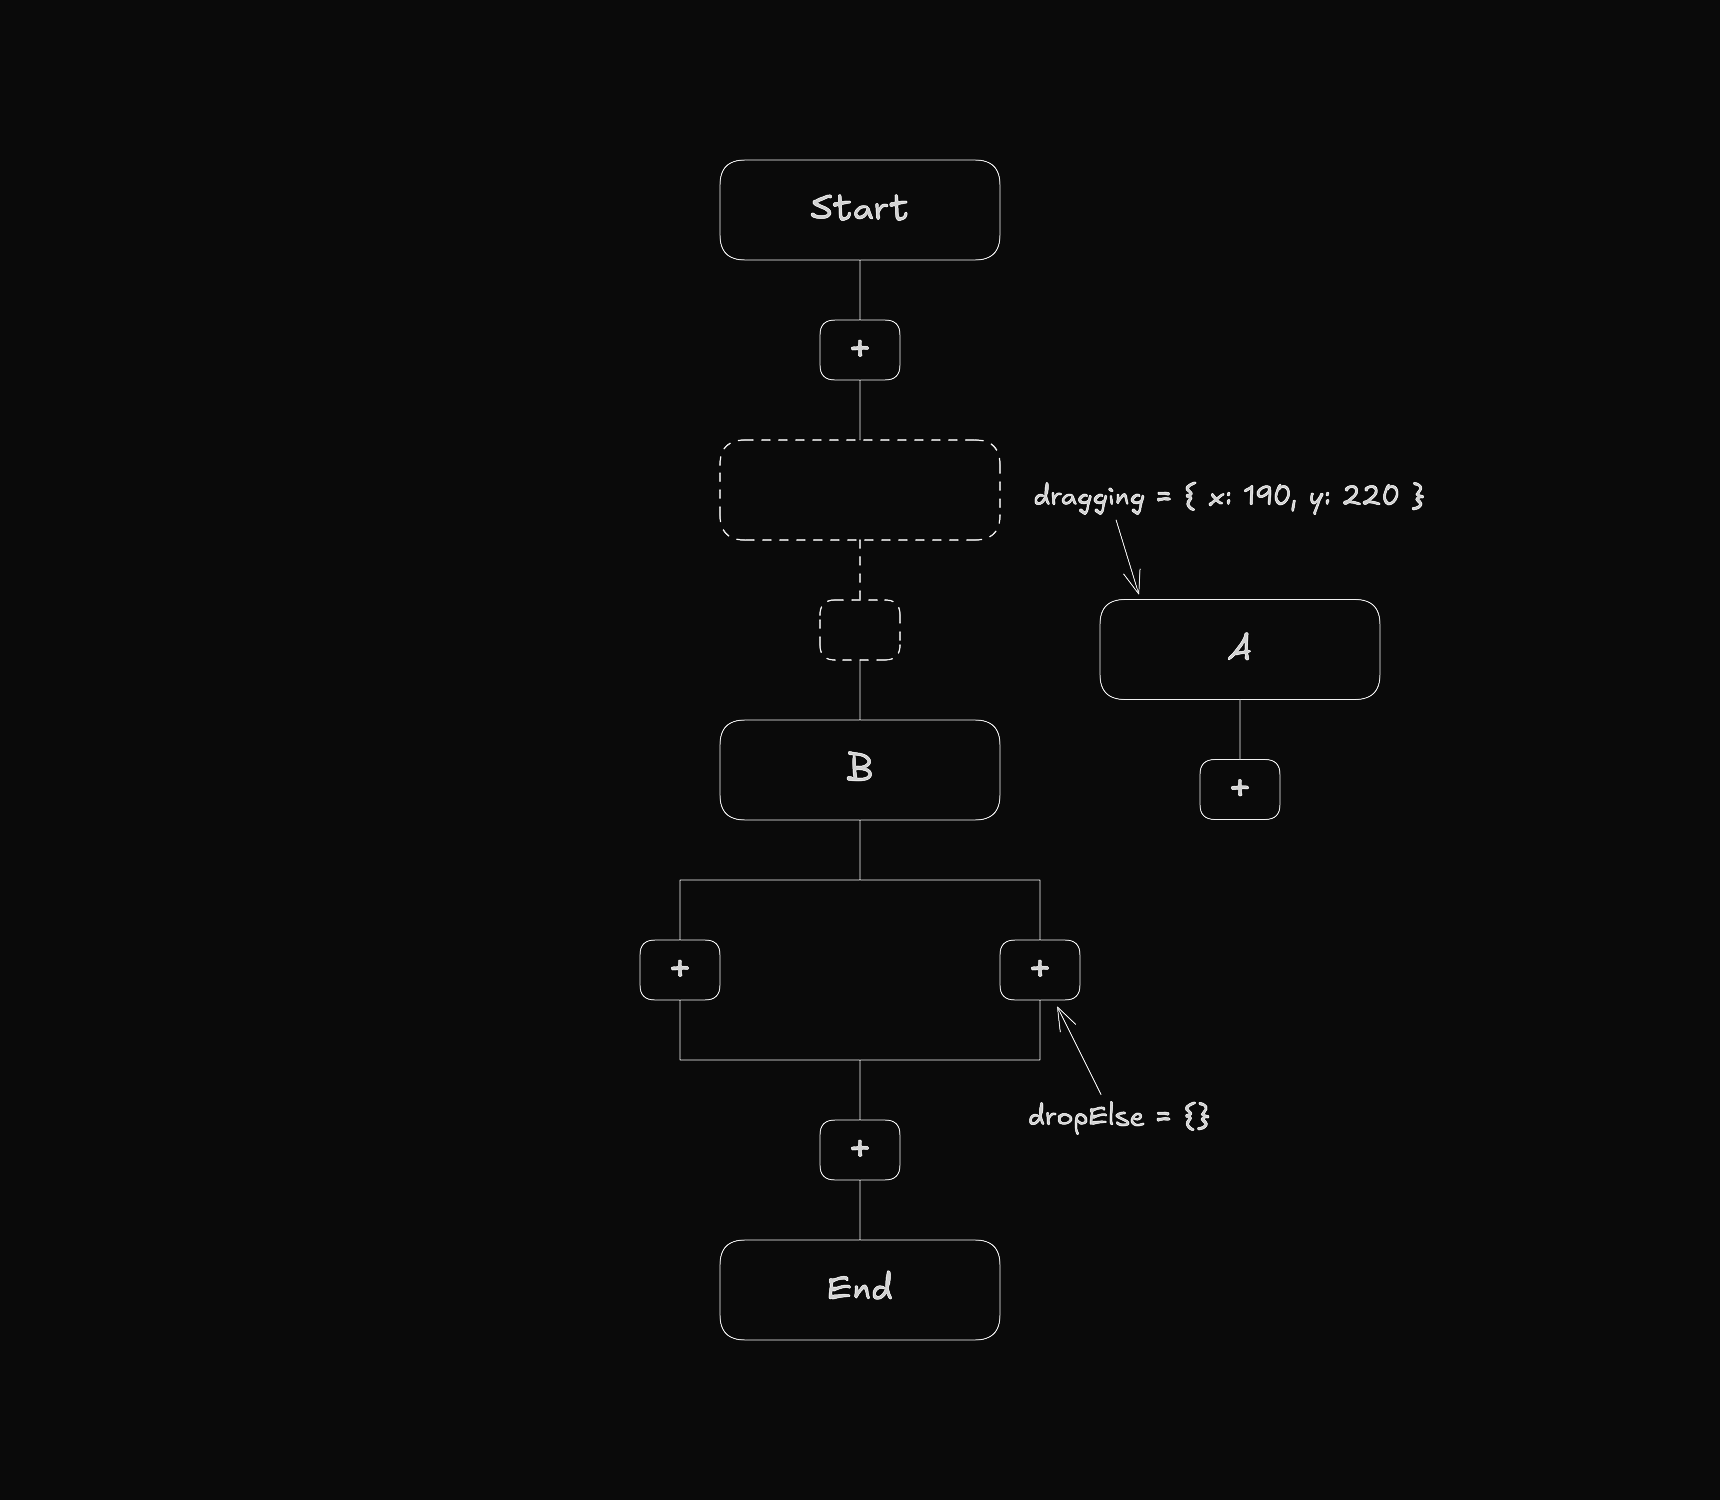
When an element gets close to a drop area, the corresponding drop property stores its id.
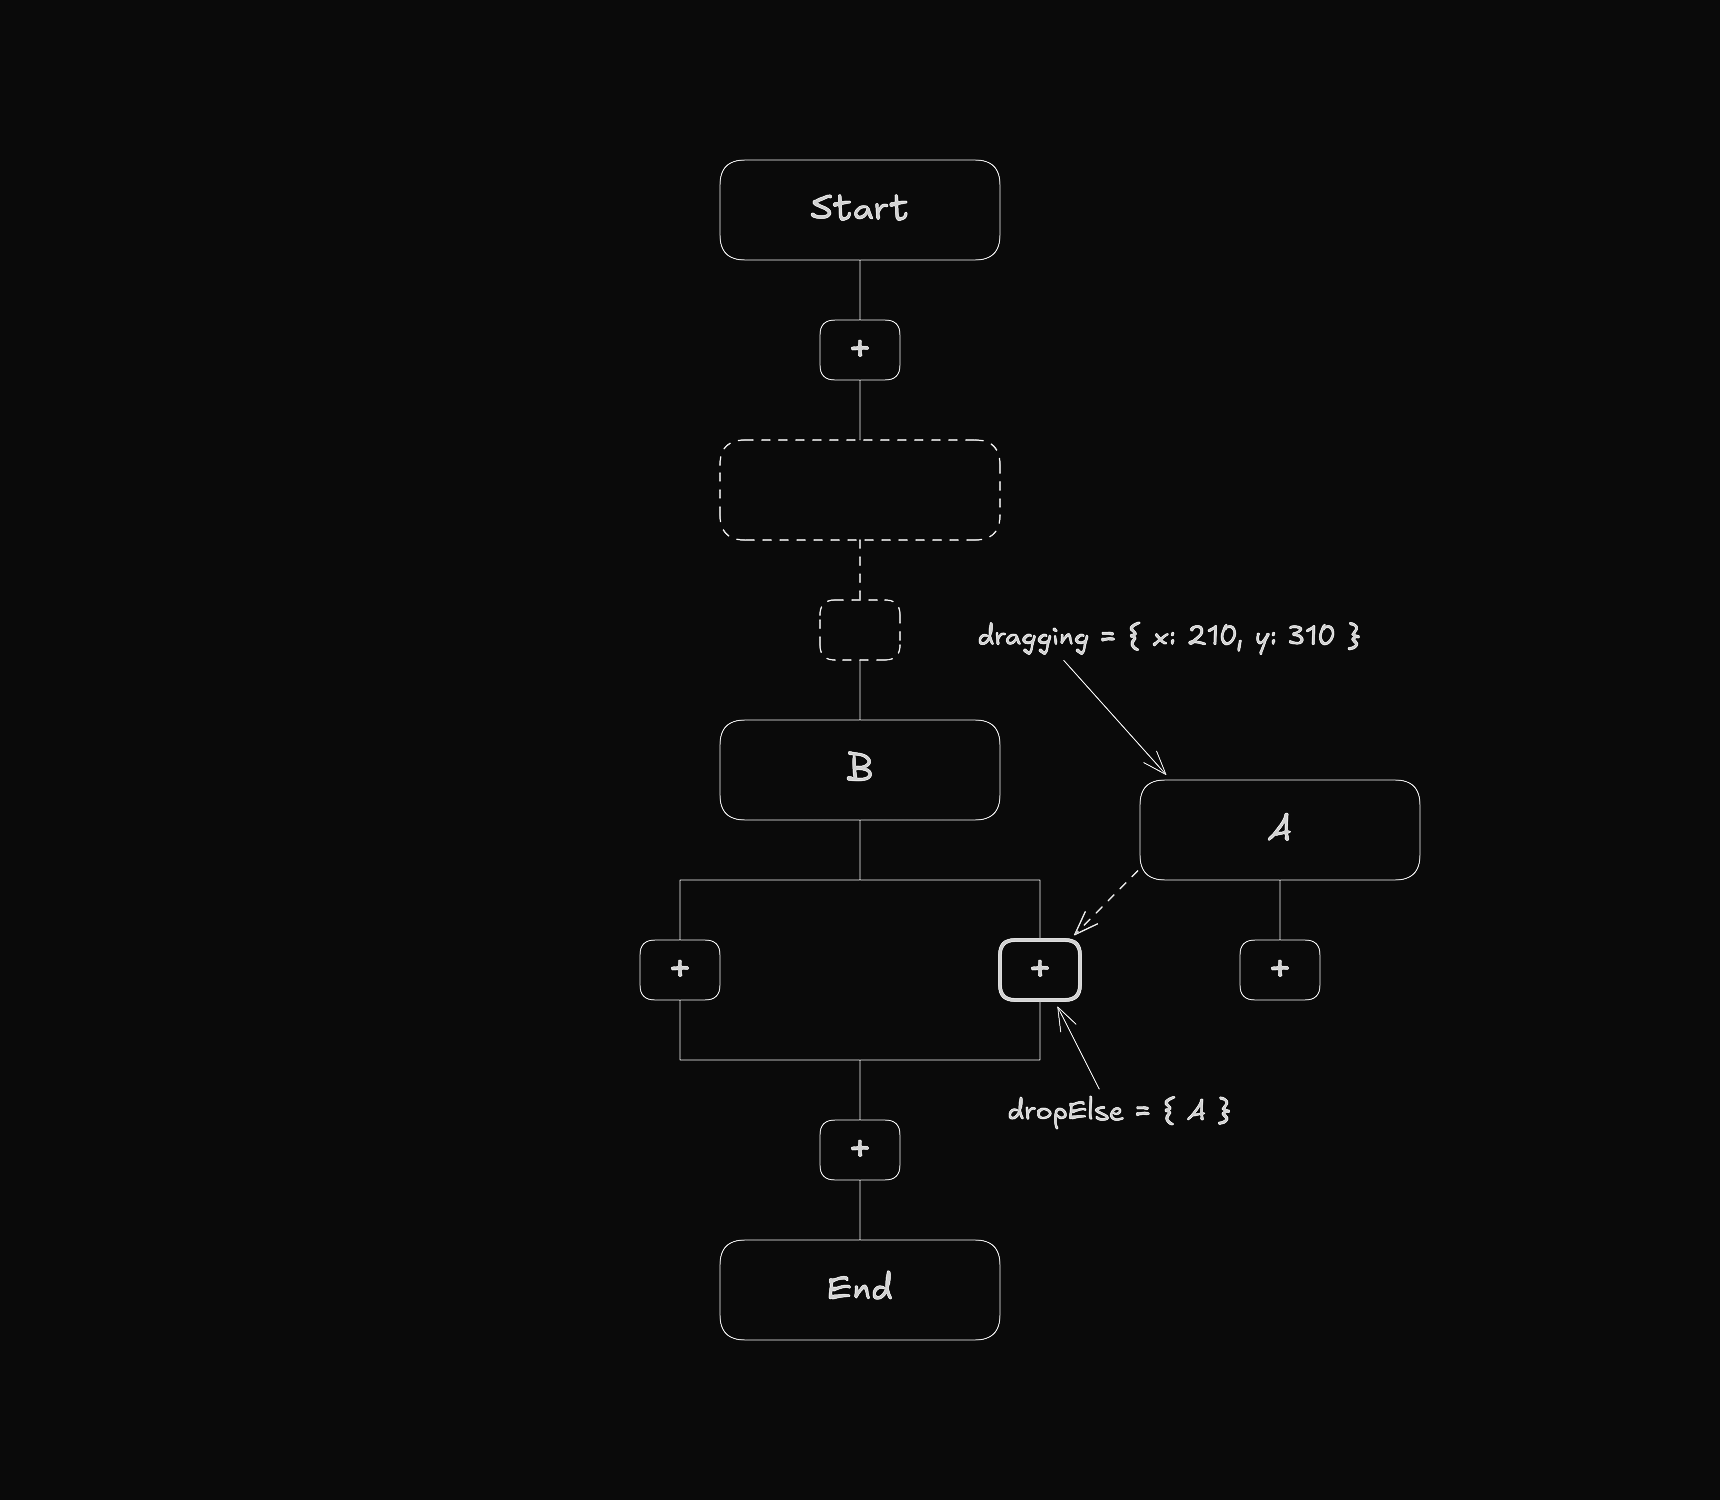
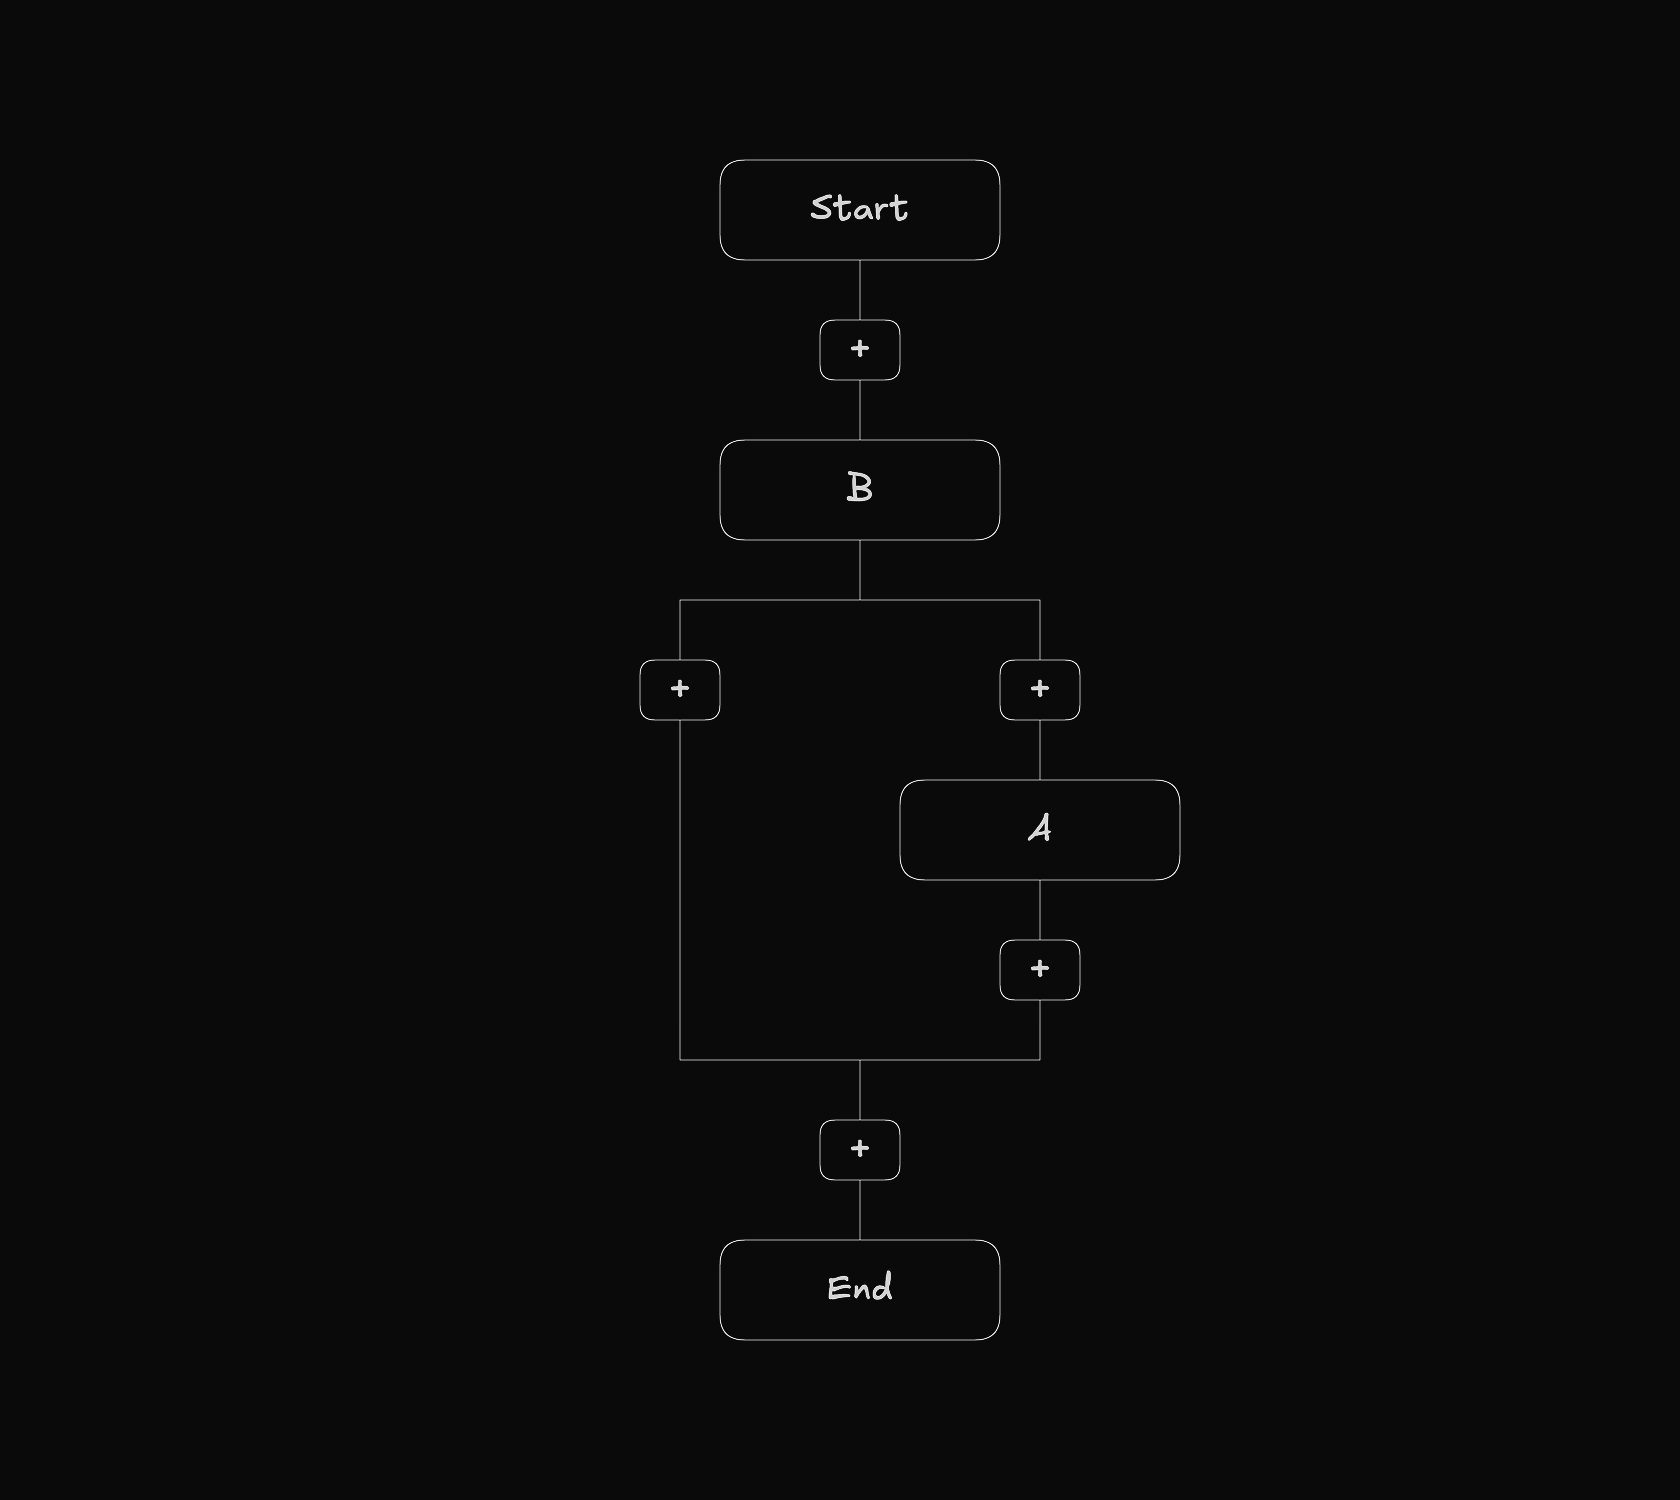
When the element is released, it is placed at the position of the drop area.
Entering and Leaving Drop Areas
Detecting when a dragged element enters a drop area requires knowing which nodes act as drop areas and finding the nearest one. To represent this information each node has a dropArea boolean property.
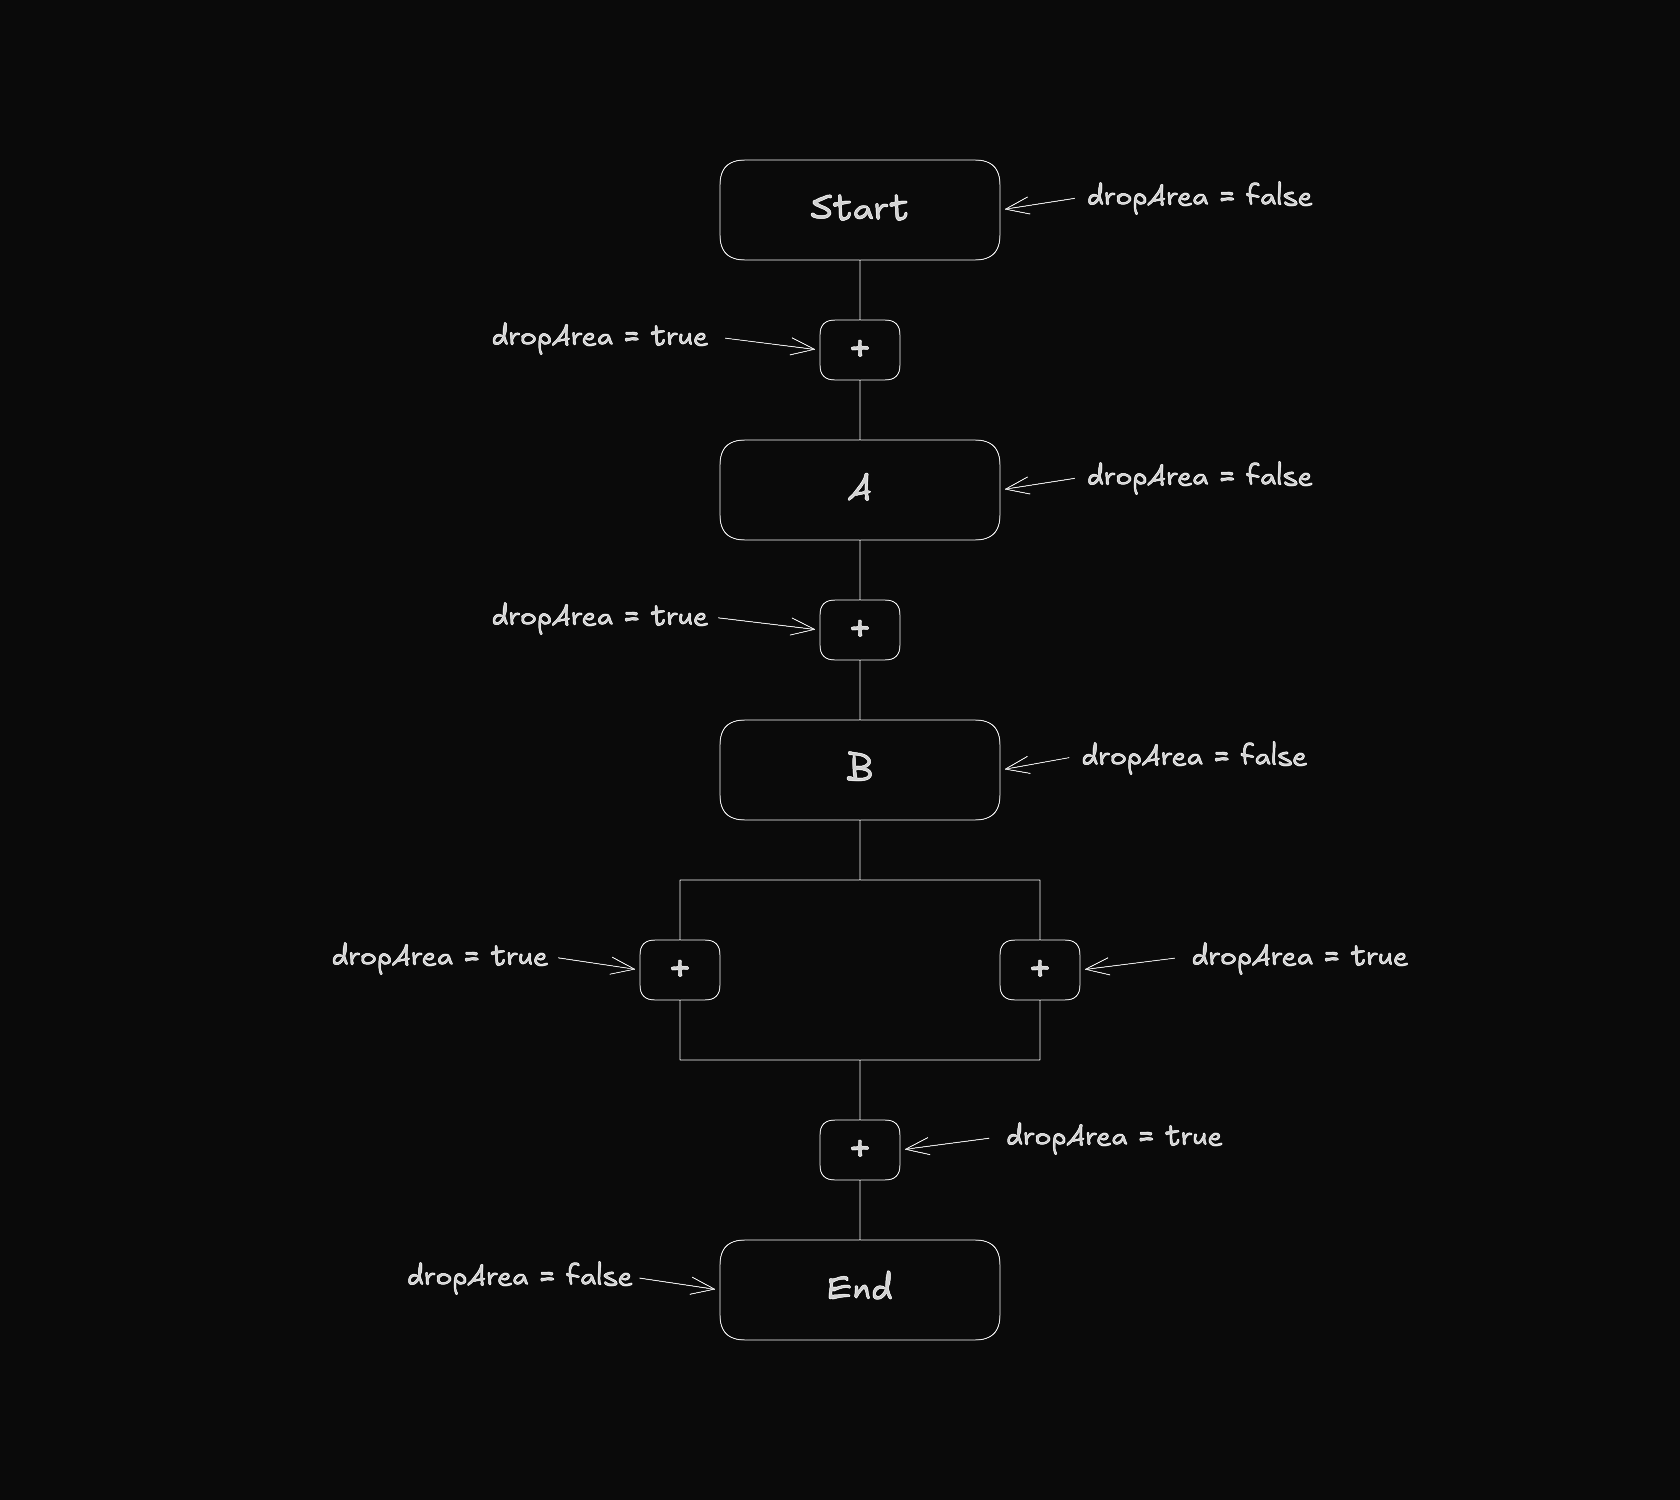
To detect when an element enters a drop area, the system checks the dropArea property of each node and finds the nearest drop area within range.
Next Steps
The next part covers the implementation of undo and redo functionality, giving users the ability to reverse and reapply changes as they build their workflow.